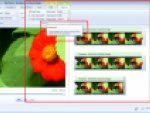
As previously stated, it is easy to create a video slideshow with Windows Live Movie Maker, but guess what? You do not have to be done. There is so much that you do with your photographs to improve your video slideshow. Here are a few examples to get you started:
- Rearrange Your Pictures – On the storyboard, you will see tiny thumbnails of all your pictures. Use these thumbnails as guides for rearranging. You can move or delete your pictures. To move, just use the mouse to click on the thumbnail you want to move and drag it to right position in the storyboard.

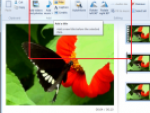
- Edit Your Pictures – The video effects that come with Windows Live Movie Maker are not just for videos; they can be used with photographs too. This means you will be able to do basic edits to your pictures. If an indoor picture appears too dark, lighten it up with the brightness effect.

- Add Transitions to Your Pictures – As you can gather from the name, transitions are extra features that you can active when transitioning from one picture to the next. I will be honest, most of Movie Maker’s transitions are over-the-top, but they are fun to experiment with.

(Using the Fade Out Effect)
- Rotate Your Pictures – We all know that it is easiest to hold the camera sideways for some shots, like full-body pictures. Unfortunately, this results in a sideways picture. You do not want a sideways picture in your slideshow. So, rotate your pictures and Movie Maker gives you a number of options. To get started, open the Home tab, choose the rotation you want, and drag that effect to the picture you want changed in the storyboard.

- Add Music or Voice to Your Pictures – Pictures don’t come with sound, but that doesn’t mean you can’t create it. Whether you want a great love song to go with a few wedding pictures or narrate pictures from your child’s first day of school, you can do it! Adding voice or music is easy, but there are some points you want to keep in mind:

- The Picture Duration – By default, pictures will stay on the screen for 5 seconds (this is before the slideshow transitions to the next picture). When transitions are added, this time drops down to about 3 seconds. If you are narrating your slideshow by describing each picture, you may need to change the timing for each photograph to give yourself enough time. There are two ways to do this:
1 – Trim Each Picture – For this, you must go to the timeline and grab the beginning and end of each picture and drag it your preferred start and stop time.
2 - Change the Time Options – For this, you must go the menu bar, click on the tools option, and then click on the advanced tab. Find the timing option and change it. This feature only changes the time on new pictures added. If you already have a collection of photos, it is best to use the above mentioned timeline trimming.


