Microsoft AutoCollage 2008 is downloaded in less than 7 MB large MSI installation package. Installation is the ordinary, just accept the license agreement and click Next. After installation you can run AutoCollage by clicking the icon on your desktop.
Create collages of your pictures
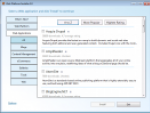
The AutoCollage program includes a minimum number of controls. This way, the program should not be of any problematic usage for the less experienced users as it’s pretty intuitive. When the program has launched, you'll see the photos which are located in the folder Images. If AutoCollage finds some pictures that are too small, they will be ignored due to their size since they will not do any good for collage creations.
On the right side panel window you will find Image Browser. This browser should be set to your default image folder for optimal usage. It contains a tree structure which makes switching to subfolders easy. Also, if you click on the three dots in the dialogue, you will be able to pick any folder on your harddisk containing the photos for creating collages.
Using tiles, you can set the number of images that should appear in your collage. If you do not want AutoCollage to pick its own settings then I suggest you prepare a folder where you copy the photos you want to use in your collage.
Setting collages
Click Options. In here you will be able to select the size for your collage. Unfortunately, the size is in inches which is a bit cumbersome for non-US / UK users. Click the Advanced options bar to display the settings of how to control the deployment of images and their overlaps.
Microsoft AutoCollage 2008 has an interesting feature; it is able to recognize faces in photos. To enable this feature and making sure that – for example – half faces appear in collages, click the Display Detected Faces option on the Input tab. You can also enable manual face detection by activating Allow Manual Face Detection in the same tab.
Have a look in the following screenshot how face detection works:
Creating collages
After you have chosen the photos they will be prepared using the necessary settings and after that, you can start creating your collage. Click Create and watch the impressing animation during which photos are gathered and collaged randomly from a carousel and displays them on the finished collage.
If you are not satisfied with the result, simply edit the number of images in the collage and click Create again.
What to do further with collages?
After collaging photos you can click the button Desktop placed in the background area – this will transfer your collage to the desktop wallpaper. Finished collages can also be saved as a JPEG-file by clicking Save and selecting which folder to save the collage in. You can also send the collage as e-mail by clicking E-Mail and wait for AutoCollage to launch your mail application, putting the collage as an attachment.
It's not free
Microsoft AutoCollage 2008 is not free, and during the 30-day trial version the program will place a watermark on the collages. You can buy the full version for $ 19.95. Collaging tool is a part of other collage and image programs (see Picasa) and since AutoCollage only does collaging while the others do everything, a 50% cut of the price would be more appropriate.
If you are interested in a digital photography, take a look at our other website, Photo HowTo.


