These Web Slices for Internet Explorer 8 can be created very easily. In most cases there is no need to completely rebuild your websites. The only thing you have to do is add a few CSS class to your HTML code. That’s all. In a few minutes you can have fully working Web Slices and valuable add-on for your Internet Explorer 8 visitors.
Web Slices implementation
The first requirements is to add a DIV which will represent the Web Slice panel. If you have this DIV in the current code already, just add class="hslice" to it and call this DIV with id="something". Remember, that the ID has to be unique in whole HTML structure so the IE8 parser will be able to cut the Web Slice code from the page.
Every Web Slice needs a name. The name could be taken from any of the elements in the HSLICE DIV. You can use H1, H2, H3, P or any other element where will be class="entry-title". You can repeat this class for more elements. The result name will use all the texts in these elements.
The last required change in your HTML code is to add class="entry-content" for the element containing the body of your Web Slice. That’s all. The result should look like this piece of code:
<div class="hslice" id="my-first-web-slice">
<p class="entry-title">Interesting name</p>
<div class="entry-content">
…there will be extremely useful content for Web Slice…
</div>
</div>
Web Slices and Drupal
As a author of the first book about Drupal in Czech I should write a few lines about Web Slices and Drupal. You can implement Web Slices for Internet Explorer 8 in Drupal using its themes and block templates, for example. Let me introduce a simple tutorial.
Go to your Drupal website theme and find a block.tpl.php template file. Most themes use the default which looks like this. Taken from www.maxiorel.cz and using Drupal 5:
<div class="block block-<?php print $block->module; ?>" id="block-<?php print $block->module; ?>-<?php print $block->delta; ?>">
<h2 class="title"><?php print $block->subject; ?></h2>
<div class="content"><?php print $block->content; ?></div>
</div>
As you can see, this template is very simple. There is a main DIV with ID, the title of the block and its content. So the changes will be very easy. Just add class="hslice" to the first DIV. The H2 title will be used for Web Slice’s name, so add class="entry-title" here. The last change is adding of class="entry-content" for the DIV with block’s content. There is a result:
<div class="hslice block block-<?php print $block->module; ?>" id="block-<?php print $block->module; ?>-<?php print $block->delta; ?>">
<h2 class="title entry-title"><?php print $block->subject; ?></h2>
<div class="content entry-content"><?php print $block->content; ?></div>
</div>
You can find the we don’t need to add a special ID for the main block’s DIV. It is already defined by the default template and use $block->module and $block->delta for unique identification. If you would like to add Web Slices only for specified block, you can use this variables for PHP conditions construction.
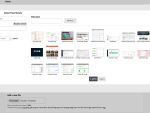
Copy the modified template file and try it. As soon as you will move the cursor over any of the blocks there will a green rectangle appear. Click on it and add your new slice to the IE8 toolbar. Check this screenshots taken from the Czech version of Maxiorel website (www.maxiorel.cz).
You can see that the Web Slice need a few CSS editing, but the basic job is done. When the IE8 cuts the Web Slice from HTML structure, it adds BODY tags around it so the Web Slice is like a small HTML page with all CSS styles from the source page. So when you design your CSS file, remember on it. A few more tricks about CSS editing for Web Slices can be found at MSDN.
If you would like to use Web Slices in Firefox, try this extension.


